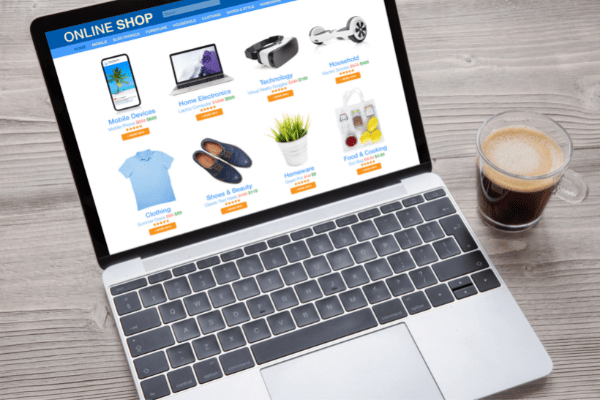
Having a website and selling products or services online is one thing, but making sure your audience finds it and starts buying what you are selling is a totally different thing. Creating a website on a platform such as Shopify will make your life easier. Not only Shopify is user-friendly and extremely intuitive, but you can also integrate several features to make sure your eCommerce website is running without flaw.
But how can you reach your audience and sell your goods? Where can people find you?
There are several places on the internet, people tend to look when wanting to buy something: search engines, such as Google, or social media networks such as Facebook, Instagram, Twitter, or Tik Tok.
After you have made the necessary steps to be present on those media outlets, how can you be sure your message gets through to your targeted audience? There are a few tools that some of the social media networks have given us, to make sure your store is discoverable and your posts reach exactly who needs to be reached. One of those tools is the Facebook pixel.
Why is the Facebook Pixel important?
Well, back in the days, when commerce was made face to face, in stores and markets, both the seller and the buyer could establish a connection. They could see the merchandise, negotiate the price or the number of items. The seller could see what type of client he’s dealing with, see if they were old or young, have a family or not, be a male or a female, how often they would buy that product and what were their issues with the product.
Those elements made selling easier and identifying the clients simpler. As we said before, the seller would rely on what he knew and on his intuition to make appealing advertising and embellish the store so the targeted clients would buy feeling they got the best deal. Today, we are selling online, without any face-to-face connection, without interacting most of the time, or just by interaction with chatbots or call center operators. That is why having all the data is important in creating a shopping experience worth having for your audience. But what is Facebook Pixels’ role in all of this? Read and see.
What is Facebook Pixel Shopify?
Before telling you how to integrate Shopify Facebook pixel, let us tell you more about the actual pixel. What is it and how can you use it for your benefit? Well, the Pixel it’s a piece of code added to your website with the sole purpose of analyzing the consumer behavior on your site.
The Pixel will track the users’ movement on the website in areas such as:
Purchasing – the end of the purchasing action
Shopping cart – when a user will add to the cart an item
Payment – when the info about the payment is added for the checkout
Search – when a user will search something on the website
Wishlist – when a product is added to a wishlist
Leads – when someone will sign up for a trial
Content – when a user will view a product page
These are all standard tracking events that Facebook pixel will monitor and report in a complete analysis. Based on them your marketing specialists will be able to find how a user behaves when they are on your website and make appropriate suggestions for promoting your goods.
Not only does the Pixel help you measure how effective your advertising has been, and collect data about the customer behavior on the website, it will help you track and remarket those who appeared interested in a product but didn’t buy. Tracking and remarketing will help you create custom audiences for the future based on all you know about people who enter your website. So when you add Facebook Pixel to the website it will help your conversion rate on Facebook. Before you add Pixel to Shopify let us tell you more just how it works.
As we said before, the pixel is a code that will load every time someone views the content on your website. The pixel will track some of this data to make sure it matches your visitors to Facebook: IP address, browser info, page location, who uses the website, the button the user will click when visiting the page pixel is attached to, pixel id and cookie, forms, etc.
How to add Facebook Pixel to Shopify
Step 1
Create a Facebook business account (if you don’t have it already) and make sure you are the admin of the said page.
Step 2
Create the Pixel. Go to your business manager and open settings, then choose More business settings. Pick your business name in the drop-down menu and click Data sources. There all you need to do is choose Pixels and click the Add button.
You will need to name your pixel to avoid any issues in the future if you’ll think about setting up another pixel and verify the domain.
All you need to do now is to click: Set up the pixel now.
Step 3
Connecting Facebook pixel to Shopify is not that hard now.
There are two ways to install Facebook pixel to Shopify.
The first one is using Shopify integration. (Add code using a partner integration)
The second one is adding the pixel manually. (Manually add pixel code to website)
The third presented option is where you use a web developer to do that. But we’ll stick with explaining how to install Fb pixel on Shopify using just those first two options.
How to set up Facebook pixel on Shopify using integration
Select the first option in Facebook: Add code using a partner integration, then select Shopify from the list.
It will take you to the website. Go to Shopify admin, then click the Sales Channel section and pick Facebook
On Setting, click Data sharing settings then go to Customer data sharing and click the Enable data sharing.
There you can choose the pixel from the list and Confirm the action.
Then go back to Facebook and tick the box which says: I’ve completed the setup on Shopify
Make sure the account is connected before adding the pixel.
You’ll need to verify the connection in the next step, add your domain, and click Send test traffic. If everything is ok your status will become: Active.
How to set up Fb pixel on Shopify using the “manually add” option
Go to Events manager on Facebook and select the Pixel you want to add, continue pixel setup, and click the second option there: Manually add pixel code to website.
Copy the Facebook pixel ID (which is the strings of numbers you can find under the Pixels’ name) then find the Header in your store code.
Locate the header template in your CMS and paste the Facebook Pixel after <head> and before </head>.
You are done!
What if you need to take advantage of the third option?
Well, at Ecomitize we are ready to help you uncover the success behind your business story. So, one of the services we offer is Shopify Development. Setting up an online business using Shopify is one of the many great things we do, therefore adding the Facebook pixel on the website is also one of our attributions.
If you cannot find what you are looking for, give us a call, type your message, and our operators will get back to you, or just type: install Facebook pixel Shopify into our chat form and you’ll get the answers.
Let us tell you in just a few words what the pixel can do for you, now that you managed to have it installed.
Create custom audiences

We mentioned before that the pixel will track all the people entering your website, then you’ll be aware who visited and if they are indeed your targeted audience. If so, make sure to play a little and develop new, custom audiences based on the data pixel will give you.
You can create ads that appeal to that specific audience. For example, you can offer them discounts, show them videos and give them bits of information about your product, show them similar products with the one they bought or watched.
Create lookalike audience
Sometimes your website is having tons of traffic, but not the sales you expect. Perhaps it is time to think about your audience. Is it accurate? Is it the audience who is interested in your products or the ideal audience?
Here comes the Lookalike audience feature which will help you create a similar audience to your initial one and see if the sales are boosted.
Make sure you have enough posts on the Facebook page, good enough offers and the website is strong and well built before choosing to play with this option.
If you are just beginning, you can leave this part for when your audience is well-groomed.
Track the movement of the user on the page
If you see that most of the customers are interested in the same products and stay on a certain page more, make sure the next ad will be about those products and will target those clients and the ones similar to them. If they have abandoned carts, show them promotions or discounts to get them to buy your product. There are more actions you can take when you know for sure what the user is doing on the website after they received the message from your social media ad.
Conclusion
Now that you know how to install Facebook pixel on a website, specifically on Shopify, you can have a better understanding of the mechanism that will lead to you selling more.
Ecomitize is there to help with an array of eCommerce services that will serve your business on the way to success. Pixel is just one of the many tools a great developer can use to make sure your ads convert into sales and that you are doing the right thing.